Published
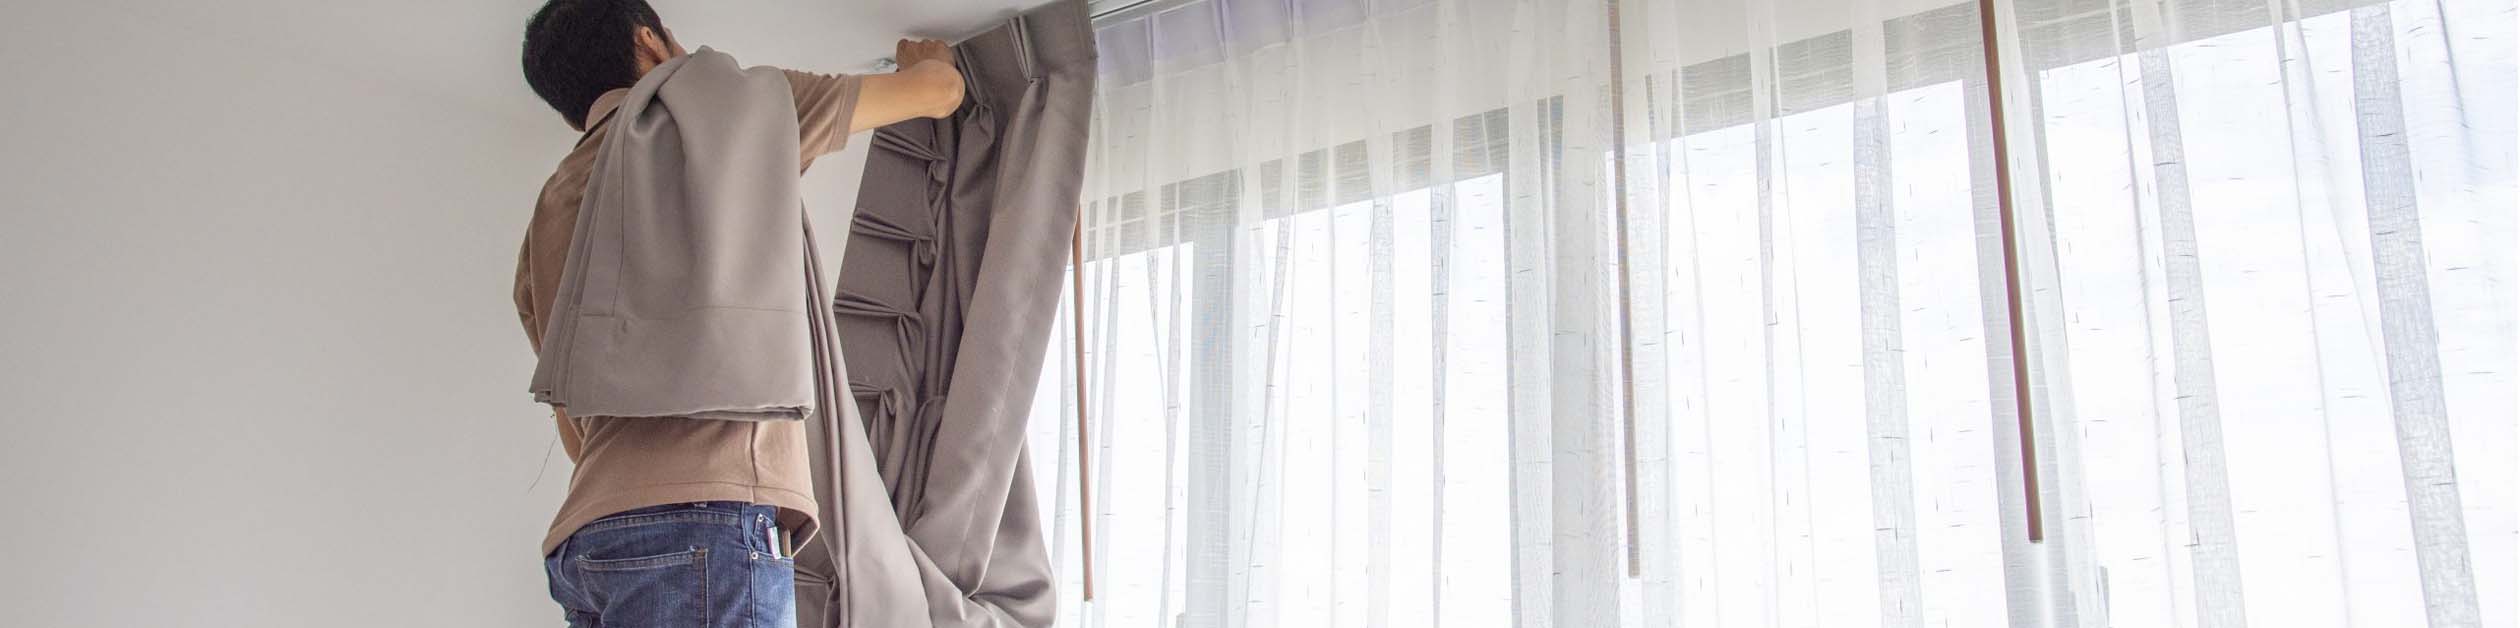
A Guide to Curtain Measuring and Installation
When preparing for window treatments, properly measuring your space is critical. In this guide, we go over what tools you’ll need and provide step-by-step instructions on how to correctly measure.
Before You Begin: Tools You'll Need
Before beginning, you'll need the following items:
- Metal tape measure (a cloth measuring tape could give you inaccurate readings)
- Pencil and paper
- Hand saw
- Level (to make sure everything is lined up properly)
- Rod with mounting brackets and hardware
- Drill with either a 3/32-inch bit (for wall studs) or a ¼-inch bit (for drywall)
- Standard screwdriver
How to Measure and Install Drapery Rods and Curtains
Now that you have your tools available, it's time to measure and install your drapery rod. We recommend that you fully read through these instructions before starting. Be sure to double check measurements and go slow — there's no need to rush.
Step 1: Measure by Width and Length
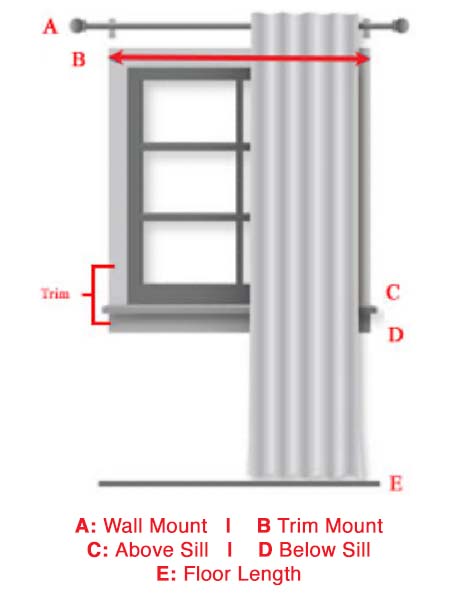
Window treatments are always measured width by length, and the width is always stated first. The length is always measured from the top of curtain panel to the floor.
Measuring for an outside mount: Generally for an outside mount, window hardware is mounted one to three inches above the top edge of the window frame. Measure horizontally from the outside edge of one side of the window molding to the outside edge of the other side.
Measure in three places: at the top, middle and bottom of the window, rounding your measurement to the nearest 1/8-inch. Take the widest of these measurements as your window width measurement.
Make a small pencil mark on the wall indicating the correct width and length. Hold the rod up to the wall using the pencil marks as a guide. Position the mounting brackets on the rod, and use a pencil to mark where the brackets will be screwed into the wall. This width should be at least 2”- 4” beyond each side of the window for each bracket placement.
Height of the bracket placement is determined by the finished drapery length and style. If the treatment is designed to be used with drapery rings, be sure there is proper allowance for the drop of the ring.
If you choose to expose your entire window: Add 6–8" to the actual width of the window to allow enough space when the curtains are completely open in order to “clear” the window.
Step 2: Drilling Holes
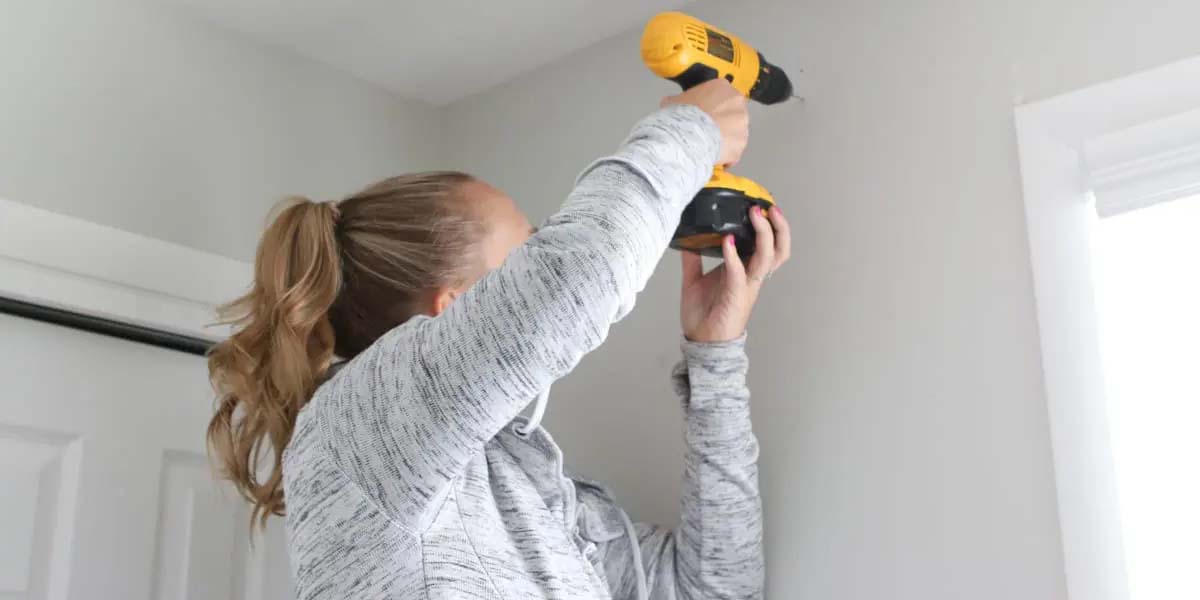
Drill holes for the bracket screws: Use a 3/32-inch drill bit if the screws will be installed in wall studs; use a ¼-inch drill bit if the screws will be installed into drywall. If you are installing the screws in drywall, you should use plastic anchors. Once you have drilled the hole in the drywall, insert the plastic anchors all the way into the hole. The screws will then screw into the plastic anchors.
Step 3: Install the Brackets
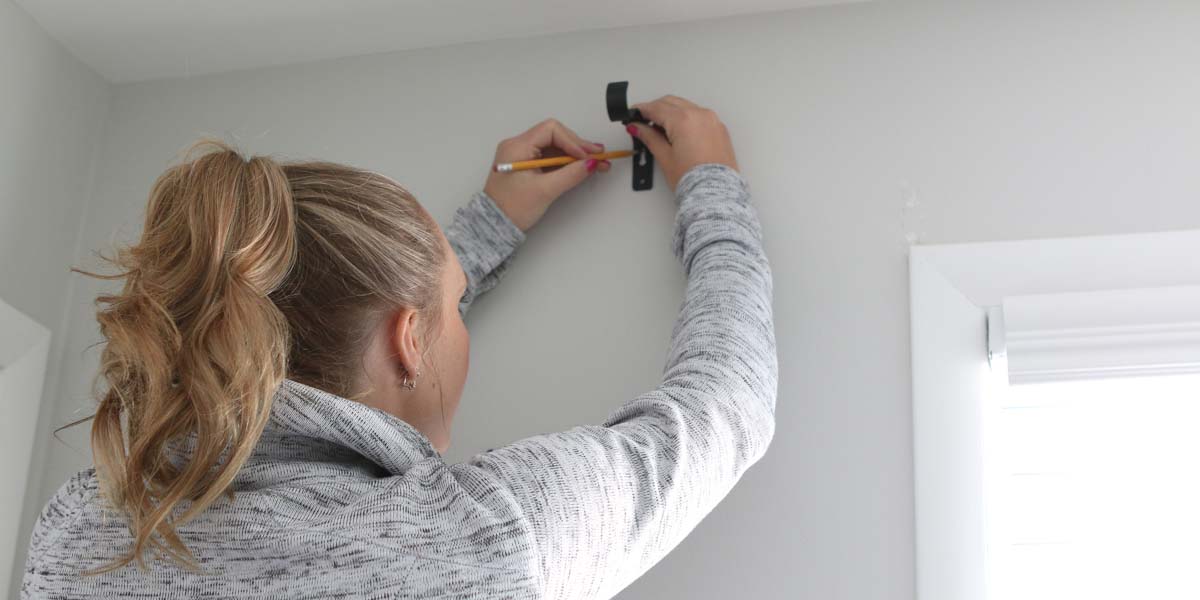
Screw in the mounting brackets: Align the screw holes on the mounting brackets with the holes you drilled in the wall. Use a standard screwdriver and screw in the bracket screws. Before you tighten the screws completely, check and make sure that the rod fits correctly into the brackets; then tighten.
Step 4: Cut Your Rod to Length
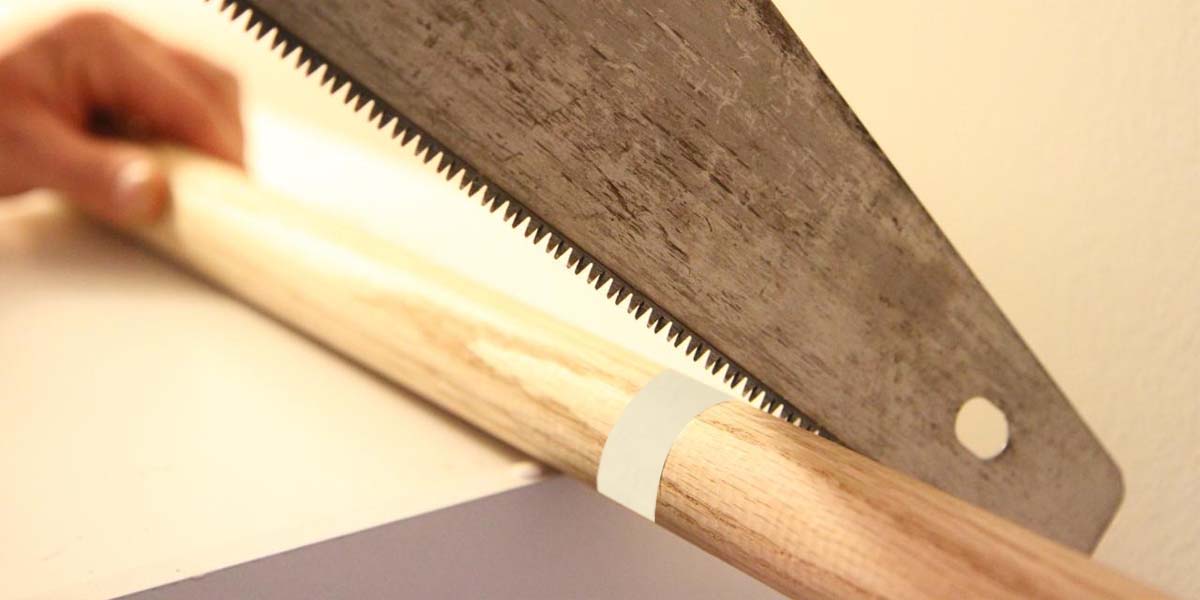
Cut the rod to the correct length. This should be 1 inch past the outside of each bracket (an additional 2 inches total). For some great tips on cutting rods, read our blog post Cutting Wood Drapery Rods. Once cut, you will want to drill a pilot hole into the center of the section of the rod you just cut so that the rod end finial will easily screw into place. Place the rod onto the mounting brackets.
Step 5: Choose Your Desired Fabric Length

The most common lengths for window coverings are: to the top of the window sill (C); to just below the window sill (D), midway between the window sill and the floor, or to the floor (E). Common lengths for standard curtain or drapery panels are 63 inches, 84 inches, 95 inches, 108 inches and 120 inches. The length you select will depend upon personal preferences, as well as other factors such as room decor.
Step 6: Install Your Fabric Panels
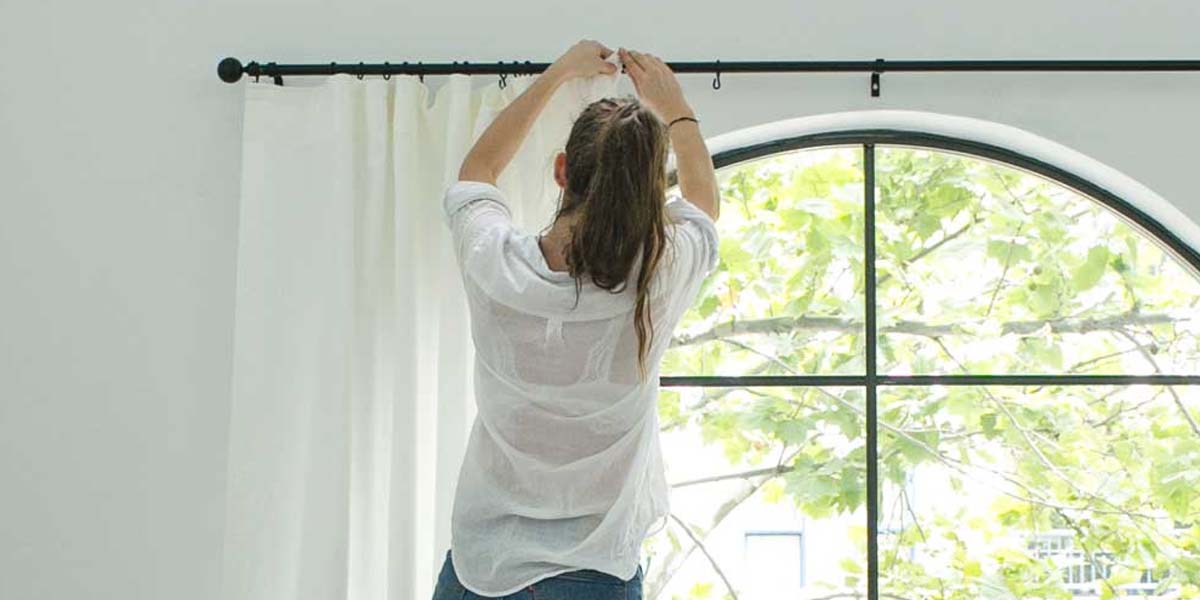
When hanging the fabric panels to the drapery rod, drapery rings may be purchased to place on the rod.
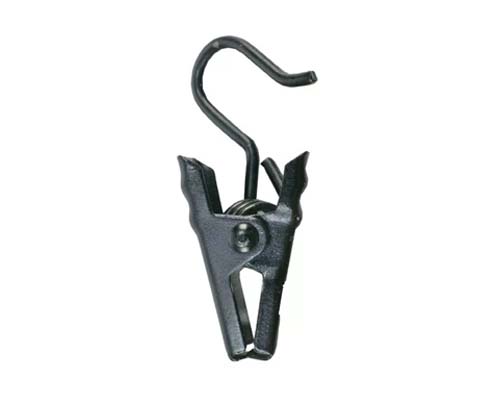
You may then use drapery clips or fabric hooks to connect the fabric to the drapery rings. In order to do this you put the drapery rings on the rod first, and then place the rod onto the mounting brackets. If you are using the clip rings to attach the panels to the drapery rings, make sure to space the fabric evenly between each clip ring so that when the panels are open each pleat created is the same.
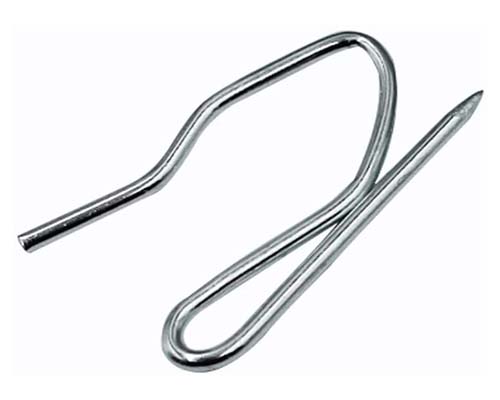
If you use fabric hooks to connect the fabric to the drapery rings, you start by sliding the pointed end of the hook up through the back of the fabric; making sure that the hook stays on the inside of the fabric and does not show in the front. Use one hook for each pleat, or equally space the hooks across the fabric. The hooks should all be the same distance from the top of the fabric — low enough that the fabric covers the eyelet at the bottom of the drapery ring. Once all of the hooks are in place, place the drapery rod in the “closed” position, to check that you have the pleats evenly spaced across the window.
An important note about fullness: Make sure to purchase enough curtain or drapery panels to give your window treatments fullness — curtains and draperies should be 1 ½ to 3 times the final measured width. Less fullness will produce a more tailored look, while more fullness will create a richer, more opulent appearance. For example, if your final measured width is 50 inches, you should purchase enough panels to cover between 75 inches and 150 inches in total width (50 x 1.5 = 75; 50 x 3 = 150).
If you have any questions, use our live chat (8am to 5pm EST M-F) or send us a message.


