Published
Cutting Wood Drapery Rods
Finished drapery rods usually come in standard sizes starting at four feet and then in increments of two feet all the way up to twelve feet in length.
Finished drapery rods usually come in standard sizes starting at four feet and then in increments of two feet all the way up to twelve feet in length. When you receive a drapery rod and find that you need to cut a portion of it off to make it fit the window you are attempting to cover, you will want to follow these simple steps to ensure that you don’t splinter the wood or scratch the painted finish.

Step 1: Choose a Saw
You want to select the right saw to do your cutting. We recommend a miter saw with a relatively new blade. Miter saws allow you to stabilize the rod and cut in a direct fixed position.

Step 2: Mark Your Rod
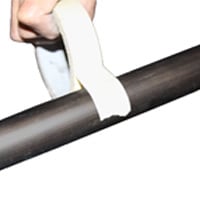
Mark the place on the rod where you want to make your cut. Then wrap 2” painters’ tape or masking tape over the mark you just made, and then mark the outside of the tape again for better visibility of where you want to cut.

Step 3: Cut Your Rod
Firmly position the drapery rod on the saw platform and make sure to hold it in place during the cutting process. It’s important that you slowly cut through the tape and the rod without stopping or changing the speed at which you are cutting.

Step 4: Remove the Tape and Wipe the Rod
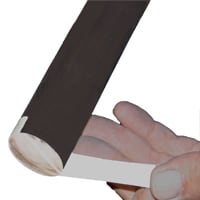
Once you’ve completed cutting the rod, you can remove the tape slowly and clean any residue off the rod that is left from the tape.
Step 5: Drill Pilot Holes
You will need to create a new pilot hole for your finial. We suggest that you use a ruler and view this video to create a quick tool to find the center of rods for drilling pilot holes. When drilling the pilot hole, you want to use a 1/8” drill bit. Drill the pilot hole 1/2" to 1" deep.


